
Disable XP Updates lifetime
Just Follow this Steps
- Click Start | Control Panel and then double-click Administrative Tools.
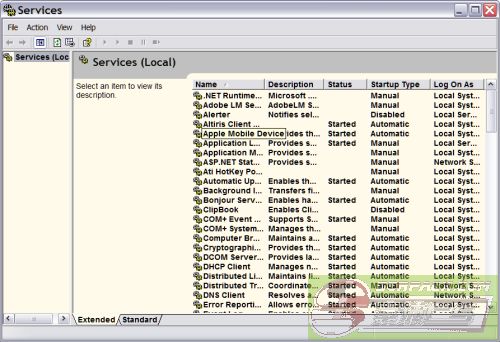
- Click on Services to open the dialog box
- From the list of services, right-click and then click Stop for the following services:
- Automatic Updates
- Background Intelligent Transfer Service
- Cryptographic Services
- Next click Start | My Computer.
- Double-click the drive where XP is installed, usually C:\.
- Double-click Windows.
- Right-click on the file folder SoftwareDistribution and rename it SoftwareDistribution.old.
- Next double-click on the System32 file folder.
- Right-click on the folder Catroot2 and rename it Catroot2.old.
- Right-click on the folder SoftwareDistribution and rename it SoftwareDistribution.old.
- Close C:\Windows\System32 explorer window.
- Now, go back to the Services folder, right-click and then start the following services:
- Automatic Updates
- Background Intelligent Transfer Service (unless it was originally set to manual and you never had to stop the service in the beginning)
- Cryptographic Services
- Close the Services Window and go to the Administrative Tools window (which should still be open).
- Click the Back Button on your toolbar to get back to the Control Panel.
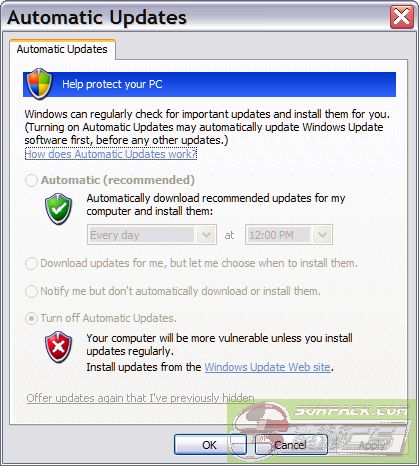
- Double-click Automatic Updates
- Select “Notify Me but Don’t Automatically Download or Install Them” radio button and then click the OK button.
- Close the Control Panel and resume computing.
Now, Enjoy irritation free OS Update
[此贴子已经被作者于2013-3-10 0:24:08编辑过]


 此主题相关图片如下:


